Roof Tile Reverse Engineering
This roof tile reverse engineering subproject focused on restoring a damaged roof while preserving its original architectural character. Instead of replacing the covering with modern alternatives, we reproduced the existing tile geometry. First, we selected a representative element. Then, we captured its shape and rebuilt the profile for production. As a result, the solution supports building documentation and accurate renovation planning. The work is part of our reverse engineering portfolio.

Roof Tile Reverse Engineering for Repeating Systems
Roof tiles work as a system, not as isolated parts. Therefore, small deviations become visible when elements repeat across the surface. We approached roof tile reverse engineering as a system task. First, we aligned the scan to stable references. Then, we evaluated how edges interact in overlap zones. As a result, the reconstructed geometry remains consistent when used at scale.
System Requirements for Consistent Coverage
- Maintain identical edge profiles for reliable overlap.
- Control spacing to keep a stable installation rhythm.
- Preserve proportions to match the existing roof field.
Geometry Capture and Condition Assessment
Existing tiles often show wear and small deformations. Therefore, we treated the scan as a reference, not a final model. First, we captured the full surface with sufficient detail. Then, we identified areas affected by erosion or local damage. In addition, we compared curves along the length of the tile. As a result, we separated original geometry from artifacts of use.
What We Evaluate in the Scan
- Surface continuity across ridges and channels.
- Edge sharpness in connection areas.
- Local deviations caused by wear.
Reconstruction for Reliable Fit and Repetition
The reconstruction step focused on fit, not only on shape. First, we rebuilt the main profile with controlled curves. Then, we refined edge zones that define how tiles interlock. Moreover, we checked alignment along a virtual row to verify repeatability. As a result, the model supports consistent placement during installation. This approach complements our work in 3D scanning and building measurement.
Reconstruction Priorities
- Stabilize curves to ensure predictable geometry.
- Standardize edges for consistent connections.
- Validate repetition across multiple segments.
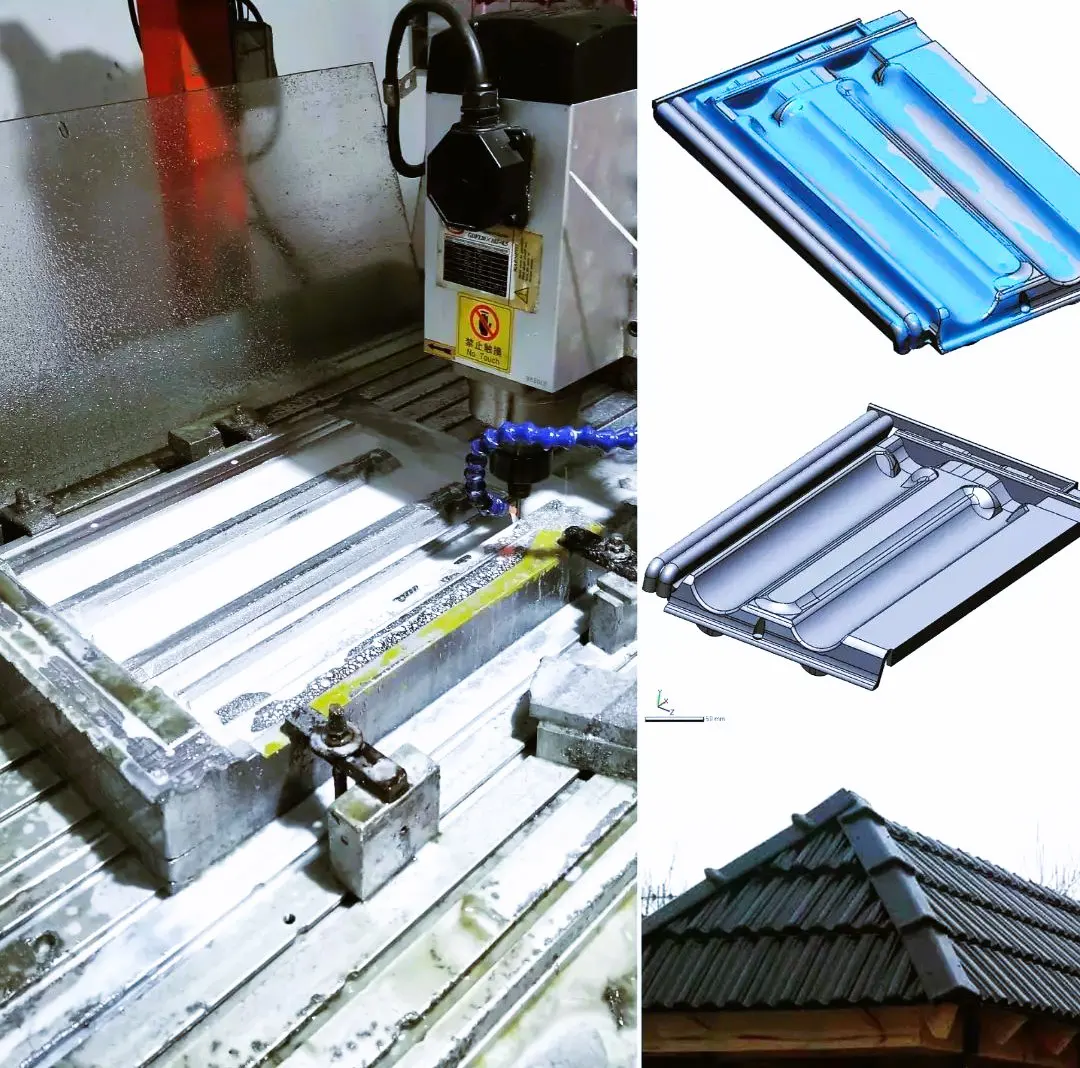
Mold Creation for Production of New Tiles
After finalizing the geometry, we created a mold based on the reconstructed model. This step converts digital data into a production tool. First, we prepared the model for casting constraints. Then, we defined separation and release features. As a result, new tiles can be produced with consistent geometry. The process links digital work with fabrication, similar to our 3D printing workflows.
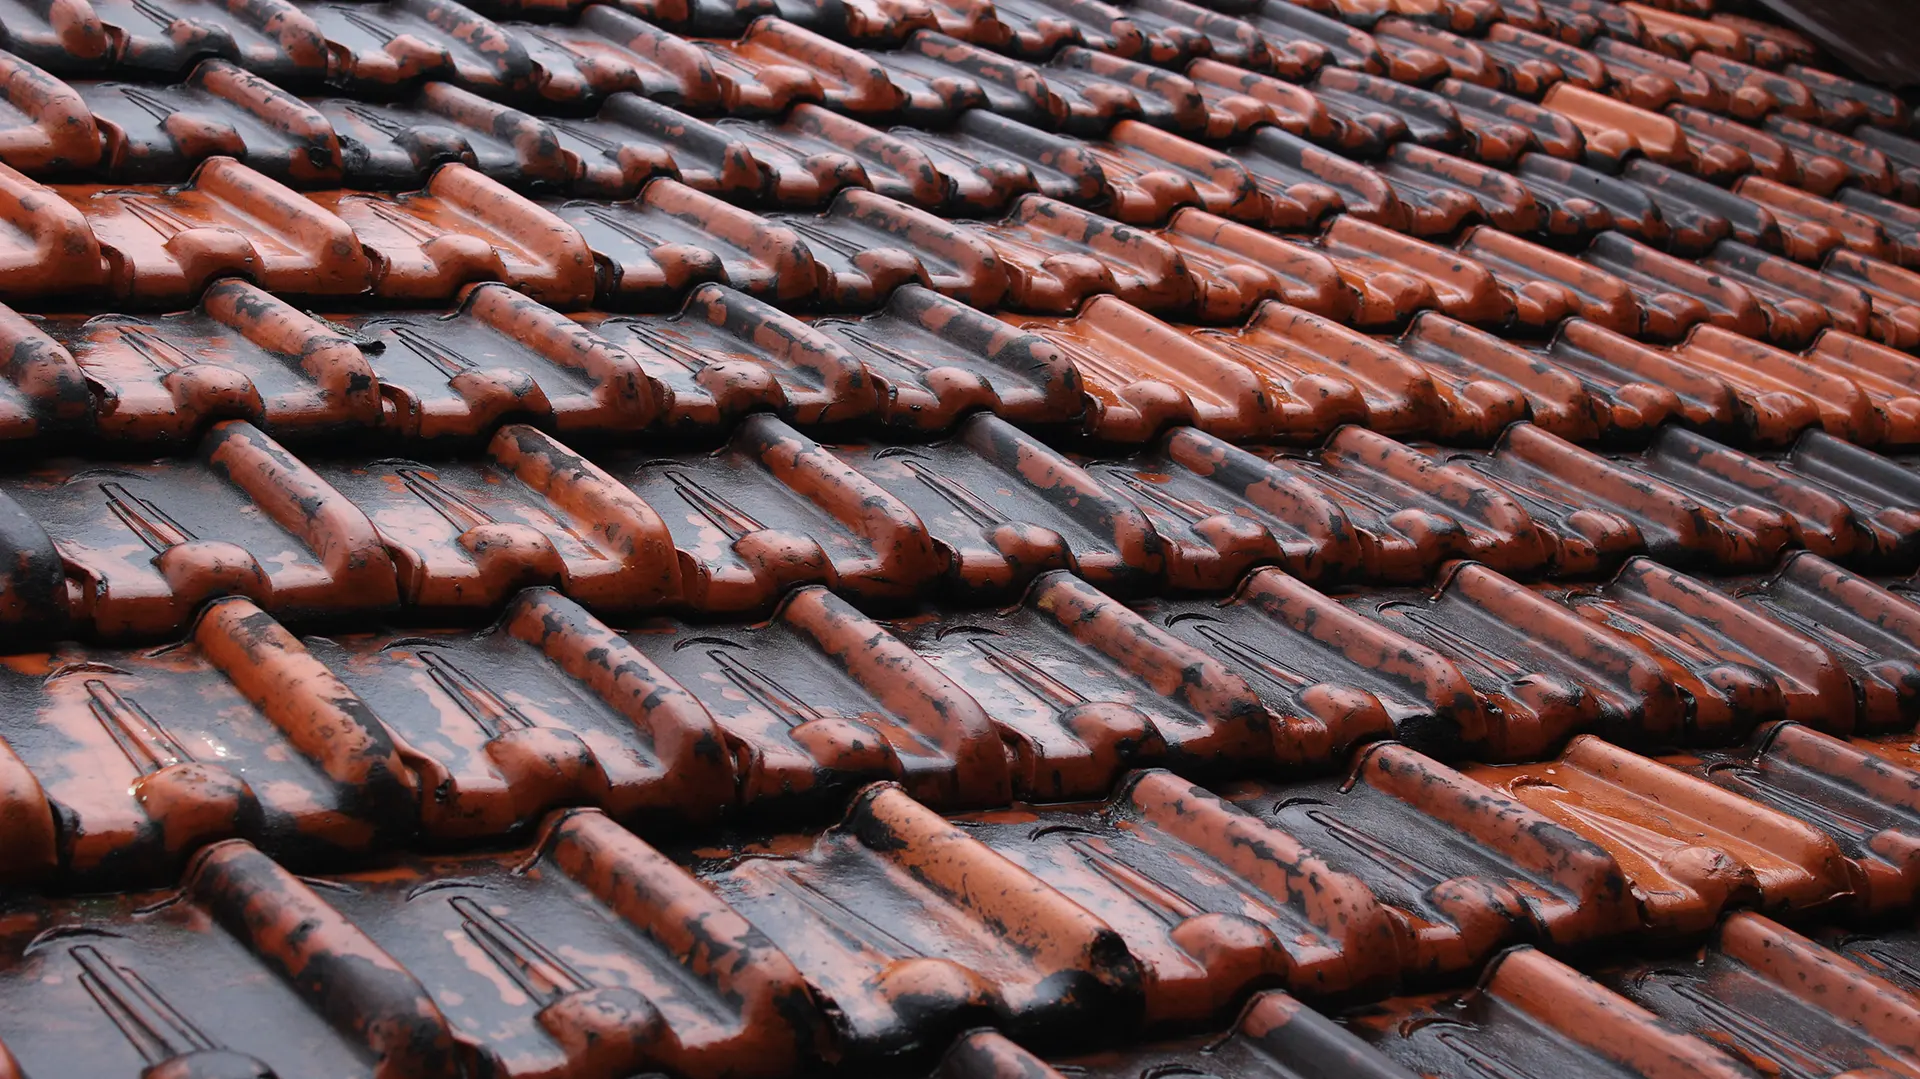
Application in Historic Roof Restoration
The outcome enables targeted repair without changing the visual identity of the building. Instead of mixing incompatible products, new elements match the original system. As a result, the roof retains its historic rhythm and proportion. This is especially relevant for conservation projects and precise scan-to-BIM driven restoration. To discuss a similar case, visit our contact page.
Project Summary
Object: traditional roof tile with repeating profile and overlap edges.
Process: 3D capture, geometry correction, and mold creation for casting.
Result: production-ready form that preserves the original roof appearance.
Propeller Blade Reverse Engineering Project FAQ
Why is roof tile reverse engineering needed for restoration?
Because standard tiles often differ in profile. Therefore, they disrupt the visual continuity of the roof when repeated.
Can one tile define the entire system?
Yes. A representative element provides the base geometry for all repeated parts after reconstruction.
Why not use the raw scan directly?
Scans include wear and noise. Therefore, reconstruction is required to achieve a stable and repeatable model.
How are new tiles produced from the model?
The reconstructed geometry is used to create a mold, which enables consistent casting of new elements.